


How poor are they that have not patience!
—William Shakespeare
Faster, faster, faster! Every day, we are met with these demands: we have to develop fast applications that at the same must be flexible, feature-rich, and user-friendly. They must run on the Internet in a browser—and not just one browser! Nope. Users like Opera, Safari, Chrome, Firefox, and IE. And some developers do not fully agree on how to read the specifications laid out by the w3.org, so they all add their little flavors and leave you as a developer out in the dark screaming your head off. Get the picture?
This article will try to give you some weapons to fight the beast of pressure and "please-deliver-tomorrow" expectations.
One thing before we head into the jungle: all the various subjects I am touching here are really huge subjects. Some might say that it is impossible to cover them in one article, but I'll give it a try.
But before we delve into the more technical part of this article, let me show you what I have in my arsenal to conquer the beast.
Let's Get a Few Things Straight!
Let's start by defining what DHTML is. DHTML is Dynamic HTML, meaning a combination of Cascading Style Sheets (CSS), JavaScript/AJAX, and the Document Object Model (DOM) glued together by HTML. The HTML can be "hand coded," but in most cases, it's generated by a script or programming language like PHP, Java, .NET, or RPG.
You might think, "Isn't it pretty cumbersome to write a good Web application even if I use an IDE? How can I cut development time down?" I believe you can cut development time if you use the right tools. These are some of the tools in my world:
- CSS—Use external style sheets to control your site.
- JavaScript—Use jQuery and jQuery plug-ins to handle the dynamic part.
- PHP—Get access to hundreds of base functions and thousands of extensions.
- RPG—You already have most of the code written, I suppose. Direct the output to XML or HTML.
On top of that, let HTML and AJAX glue everything together in a flexible and functional Web application. Bingo! You're on your way.
So now that the playing field is identified, let the games begin! I will provide more detail and give you some simple examples to help you understand.
Use External Style Sheets
If you have done even just a little Web programming, you might already know about CSS and the use of external style sheets. But still, here is a very simple example. Let's say you want to make some text bold and red. In the "old" days, you would use HMTL code like this:
<font color="#FF0000"><b>My Text</b></font>
But when using CSS, it would be like this:
<span style="color:#FF0000;font-weight:bold;">My Text</span>
If you load either code in a browser, you cannot tell the difference.
But let's expand the example and move the CSS code into an external style sheet (you could also place it in the <header> section, but that would end up the same) and create a class to hold the formatting. Then your code would look like this:
<html>
<head>
<title>Build Snappy Web Apps with HTML, DHTML, CSS, and JavaScript - EX 1</title>
<link rel="stylesheet"href="ex1.css"/>
</head>
<body>
<font color="#FF0000"><b>My Text</b></font>
<br>
<span>My Text</span>
</body>
</html>
As you can see, the CSS is "copied" into the HTML document using the <link rel….> tag. The CSS class is defined like this:
.myText {
color: #FF0000;
font-weight:bold;
}
Now we are getting to the clever part, where you can reuse the style sheet class across various HTML documents.
Download example 1, and load the index.htm file into your browser. You will have a view of all the documents in the example in a frameset.
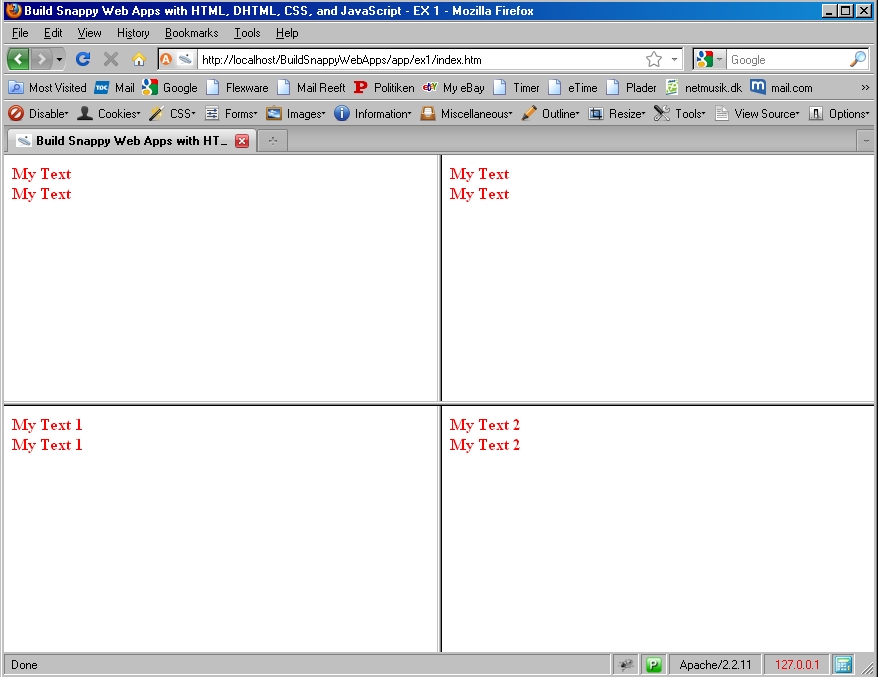
Figure 1: This view shows all your documents in a frameset. (Click images to enlarge.)
Now let's say you are told to change the text to blue and make the font size 16 point. If you use the <font> tag, you have to load all documents into an editor and change each tag manually. And the 16pt would not really be possible because you only have a size parameter of 1 to 7 and you really do not know what the point size is on those. So you load the ex1.css style sheet file and add the following to the myText class:
.myText {
color: #0000FF;
font-weight:bold;
font-size: 16pt;
}
Your job is done!
This is a very simple example, but I am sure you get the idea. CSS is a huge subject, so at the bottom of the article, I provide a link section that offers some great links to get you started with CSS styling.
One small note: CSS classes are case-sensitive, so be careful when using mixed case like I have done.
JavaScript and jQuery
JavaScript is the thing that makes a Web site alive; it's used all over the Internet, and when you start using it, you will be amazed what you can do with it. You will also be amazed what you can't do, especially coming from RPG and being used to things like date calculation and strict data types.
Most people start doing JavaScript "by hand," and so did I. When I had a problem, I asked Miss Google about it and found some examples. For years, that worked just fine for me. But then six months ago, I was forced into a project where jQuery was used. I had been to jQuery's Web site and had looked at some examples, but to be honest, I did not really understand it. The syntax was odd, and terms like call-back, DOM elements, and likewise were too difficult to learn, so I avoided it.
But once in a while, you are forced to learn new tricks, and so was I with jQuery.
I am not saying I am an expert, but I am beginning to find my way around, and I must confess that I am sold. It really speeds up the development process and lets me do things faster and more smoothly than I ever imagined possible. True, the syntax is something you have to learn, and sometimes you are lost in all the brackets and parentheses, but you will learn it, and when you discover the plug-in part, the sun will shine on you and your users will be truly amazed.
So what is jQuery? According to Wikipedia, jQuery is "…a cross-browser JavaScript library designed to simplify the client-side scripting of HTML." And that is just what it is.
What does it cost? Nothing! JQuery is open-source, so it is free for you to use.
The first thing you should know is how to get it. Point your browser to jQuery.com and download the latest version, which is 1.4.4 at the time of writing. You can download two different versions of jQuery: a "minified" version and an "uncompressed" version. The only difference is the size of the library and therefore the internal loading time in your browser.
Another alternative is to use a version on a content delivery network (CDN), which is a network that holds copies of the jQuery library. Both Google and Microsoft have a CDN network you can use.
To make this clear, look at the example below, which shows how you would address jQuery in an HTML document using a CDN and locally.
<html>
<head>
<title>Build Snappy Web Apps with HTML, DHTML, CSS, and JavaScript - EX 2</title>
<script src="https://ajax.googleapis.com/ajax/libs/jquery/1.4.4/jquery.min.js"></script>
</head>
<body>
Addressing jQuery — Google CDN
</body>
</html>
Example 2a: Addressing jQuery Using Google CDN
In example 2b, the code is stored inside a folder call "Javascript," and the code for addressing it will look like below.
<html>
<head>
<title>Build Snappy Web Apps with HTML, DHTML, CSS, and JavaScript - EX 2</title>
<script src="/javascript/jquery-min.js"></script>
</head>
<body>
Addressing jQuery - locally
</body>
</html>
Example 2b: Addressing jQuery Locally
A small tip: If you are using Firefox, it is very easy to see if your "links" are working. On the page in question, right-click and select View Source or press Ctrl+U, locate the link in your code, and just click it. If not found, you will get a message; if found, you'll see all the code. Use Alt+left arrow to navigate to the previous page.
In the link section at the end of the article, I have added some links that point to some pages that give you an overview of jQuery.
jQuery Examples Coming Up!
I hope you still are reading and now are ready to create your first jQuery example.
First, download jQuery. Right-click on the Minified link and select "Save link as." Save the jquery-min.js file somewhere in your Web server root (if you do not know what I am talking about, please read one of my articles about setting up a local Apache server). You are now ready to use it.
As in all my examples, I have a folder structure that looks like the one in Figure 2.
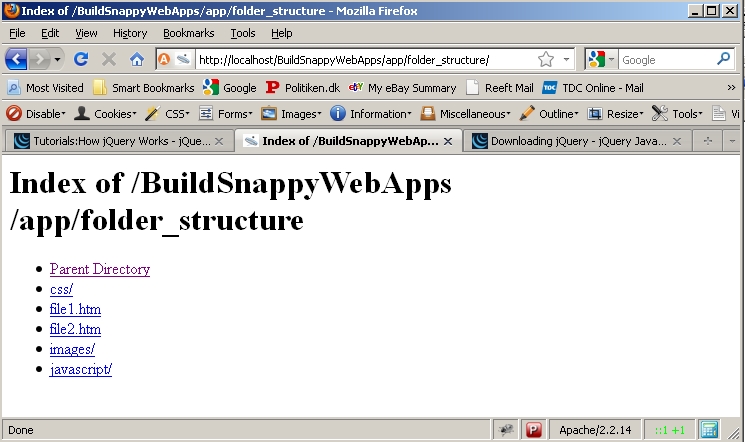
Figure 2: Here's the general folder structure: css, images. and javascript.
You might have other ways of doing it, but the reason I use this structure is that I am always "looking down" into my folders and I always try to avoid linking "up" the folder structure. That way, it is very easy to copy my whole Web site to an external Web server because I just copy the "root" folder (in this case called "folder_structure") and I do not have to worry about whether I have forgotten images or other elements.
One basic thing to learn when starting to use jQuery is the "ready" event. Before Javascript code is run, the HTML page must be fully loaded. When the page is fully loaded, Javascript can start manipulating the elements on the page, and the ready event does just that. The ready event is coded like the example below:
$(document).ready(function(){
// Your code goes here
});
In the first jQuery example, I will show you how to change the size and color of a header in an HTML document by adding and removing a class to some text. The example is completely useless, but it gives you an idea of what the syntax is and how the jQuery API is used.
The following APIs are used:
<html>
<head>
<title>Build Snappy Web Apps with HTML, DHTML, CSS, and JavaScript - EX 3</title>
a) <link rel="stylesheet"href="css/main.css"/>
<script src="/javascript/jquery-min.js"></script>
<script>
<!--
$(document).ready(function(){
b) $('#change_header1').click(function() {
$('#header').addClass('new_header');
});
c) $('#change_header2').dblclick(function() {
$('#header').removeClass('new_header');
});
});
-->
</script>
</head>
<body>
d)
<span>Build Snappy Web Apps with HTML, DHTML, CSS, and JavaScript - EX 3</span>
<p></p>
e)
<a href="javascript:void(0)">Add class</a>
<a href="javascript:void(0)">Remove class</a>
</body>
</html>
Example 3a: Adding and Removing a Class Using jQuery
Here is what happens:
- Address the CSS and jQuery files to make them available for the HTML document.
- Inside the "ready" event, I "bind" a click event to the href link with the ID "change_header1" and specify that when clicked, it shall add the class name "new_header" to the <span> tag named "header." Note that this tag already has a class called "old_header" added to it.
- Bind a double-click event to the href link with the ID "change_header2." And when double-clicked, remove the "new_header" class.
- The HTML code for the text to be changed.
- The definition of the href's to click.
At first glance, this might seem a bit confusing, but fear not; download the example from the download link at the bottom of this article and run it in your browser. When you see how it works, I am sure you'll "get it" right away.
Now let's move on to example two. In this example, we will create a button that, when clicked, will display a text box where you can enter some text. At the same time, we will change the text on the button and add a class to make the text red. Then when you click the Save button, the text area will vanish and the button text will once again be changed; when done, a callback function will be called to show an alert telling you that the text is saved.
Does it sound like a lot of coding? Let's see.
The following APIs are used:
<html>
<head>
<title>Build Snappy Web Apps with HTML, DHTML, CSS, and JavaScript - EX 3</title>
a) <link rel="stylesheet"href="css/main.css"/>
<script src="/javascript/jquery-min.js"></script>
<script>
<!--
b) var toggle_checker = false;
$(document).ready(function(){
c) $('#message_button').click(function() {
d) $('#message_box').toggle('slow', function() {
e) if ( toggle_checker ) {
f) $('#message_button').val('Update Message').removeClass('red');
g) alert('Data saved....')
h) toggle_checker = false;
} else {
i) $('#message_button').val('Save Message').addClass('red');
j) toggle_checker = true;
}
});
});
});
-->
</script>
</head>
<body>
k)
<input value="Enter Message">
<br>
l)
<textarea rows="4" cols="40">
....enter something here...
</textarea>
</body>
</html>
Example 3b: Controlling a Text Area with jQuery
Once again, let's run through the code to see some jQuery magic.
- Address the CSS and jQuery files to make them available for the HTML document.
- Declare a variable to control the toggle state.
- Bind a click event to the button with id "message_button."
- Add the toggle API to the text area with the ID "message_box" and tell the API that the "slow" option is to be used. Add an anonymous callback function to the toggle API. This is just a block of statements that will be called every time the toggle API has finished.
- Check the state of the toggle_checker in order to control the button and alert.
- If true, add a class called "red" and change the button text.
- Show the alert.
- Change toggle_checker state.
- If false, add class to make button text red and at the same time change the text.
- Change toggle_checker state.
- Define the input button.
- Define the text area.
I really hope you still are with me. I know that this might be quite a lot to comprehend, but as said before, download the example at the bottom of the article and run it in your browser, and I am sure you'll see it more clearly.
One small note: In f) and i), please note that it is possible to use more than one API at a time on an element.
In my examples, I have used IDs to manipulate the elements on the HTML page, but jQuery lets you manipulate more than just IDs. Have a look at the list below to get an idea what you can do.
- $("#id").do_something… (id will only affect one unique ID on the page)
- $(".class").do_something… (class will affect all classes on the page)
- $('p').do_something… (do something to all paragraphs or to any other HTML tag on the page)
In the above, I have given you an introduction to jQuery. The examples show just a fragment of what it can do.
jQuery Plug-Ins Very Briefly
One last thing I will mention before I close up is jQuery plug-ins. This is where the fun really starts. A lot of very creative and clever people have created jQuery, and on top of that, another lot of creative and clever people have created hundreds of plug-ins that let you do things more simply and easily than you would ever imagine.
Have you ever needed to add Google Map to a Web page, create a date picker, provide form validation, offer drag-and-drop functionality, or use AJAX? jQuery plug-ins let you create very complex and cool effects on your Web page very simply and smoothly.
I will provide a small example using a jQuery plug-in called goMap, which is built over the Google Map API version 3. I will show you how to create Google Maps more easily than you ever thought possible. The goMap has its own Web page, and I encourage you to visit it and look at all the examples and tips on the page. And if you use it, remember to hit the PayPal donate button.
The code example below shows all you have to code to create a map on your page and make it point to Odense, Denmark, which is where I live.
<html>
<head>
<title>Build Snappy Web Apps with HTML, DHTML, CSS, and JavaScript - EX 3</title>
<script src="http://maps.google.com/maps/api/js?sensor=false"></script>
<script src="/javascript/jquery-min.js"></script>
<script src="/javascript/jquery.gomap-1.2.2.min.js"></script>
<link rel="stylesheet"href="css/main.css"/>
<script>
<!--
$(document).ready(function(){
$(function() {
$("#map").goMap({
markers: [{
latitude: 55.403756,
longitude: 10.40237,
id: 'my_town',
html: {
content: 'This is where I live...',
popup: false
}
}],
hideByClick: true,
disableDoubleClickZoom: false,
zoom: 7,
maptype: 'roadmap'
});
});
});
-->
</script>
</head>
<body>
Build Snappy Web Apps with HTML, DHTML, CSS, and JavaScript - EX 4
<hr>
<div></div>
</body>
</html>
Example 4: Use jQuery Plug-in goMap to show Odense, Denmark
Click here to see it in action: http://agnethe.dk//mcpressonline/buildsnappywebapps/ex4/ex4a.htm
A Real Application Built Around jQuery
I have created a real application called Persons just to show you what jQuery really can do.
The Web site is a PHP application that uses AJAX, Google Map, and some jQuery plug-ins.
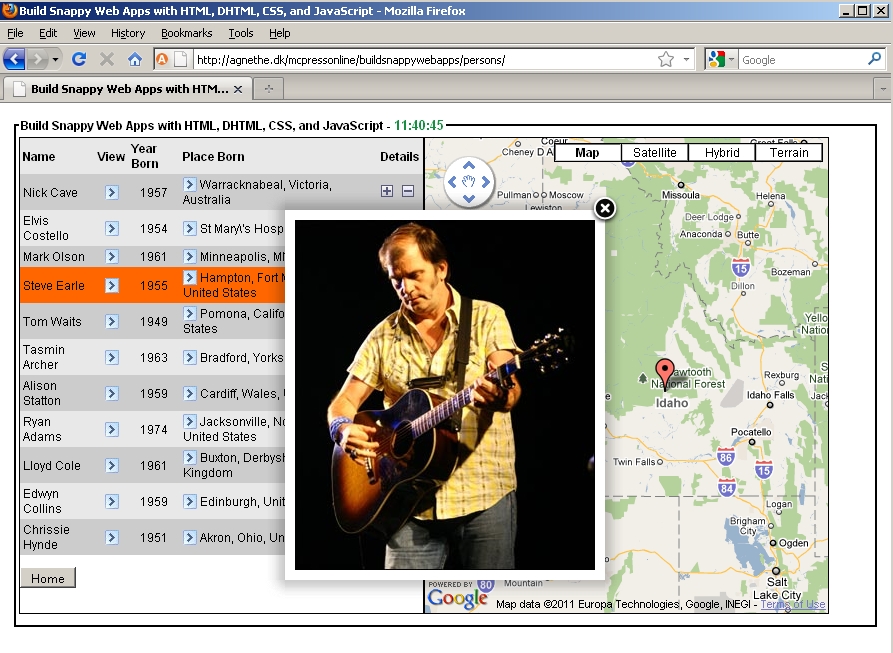
Figure 3: Here's what the Persons application looks like.
These are some of the features within it.
- Load a table of persons using AJAX (rock musicians, of course).
- Click to see a photo.
- Click to see where they were born on a Google Map.
- Click to see the albums they have made.
- Use mouse rollover.
- Retrieve the time using an AJAX call.
- Automatically adjust the size of maps and such when resizing the browser window.
All this is created using jQuery and jQuery plug-ins. You might want some of the features to behave differently, so just download the application and change whatever you want to change.
Because I have already used my allotted space for this article, I will not go through the all the code; instead, I'll leave it up to you to have a look at it and find all the goodies yourself. If you have any questions or comments, feel free to use the forum associated with this article. I'll do my best clear things up.
To see the Persons application in action, point your browser to the following address:
http://agnethe.dk/mcpressonline/buildsnappywebapps/persons/
Moving Ahead All the Time…
I hope this article inspired you to start using a tool that can really speed up the development process, add features to your Web site that would be hard to code on your own, and least but not least put some fun and enjoyment into your programming life.
Till next time, happy jQuerying, and now that you know where Odense is, let me know if you're ever in the neighborhood!
Links and Downloads
Download
All the examples and the Person application: http://agnethe.dk//mcpressonline/buildsnappywebapps/app.zip
jQuery Links
Main: http://jquery.com
Download: http://docs.jquery.com/Downloading_jQuery#Current_Release
Tutorials: http://docs.jquery.com/Tutorials
Plug-ins: http://plugins.jquery.com/
Wikipedia: http://en.wikipedia.org/wiki/JQuery
goMap by pittss: http://www.pittss.lv/jquery/gomap
CSS Tutorial: http://www.w3schools.com/css/default.asp
Document Object Model: http://en.wikipedia.org/wiki/Document_Object_Model
Example Links
Example 4: Google Map – Odense, Denmark http://agnethe.dk//mcpressonline/buildsnappywebapps/ex4/ex4a.htm
as/400, os/400, iseries, system i, i5/os, ibm i, power systems, 6.1, 7.1, V7,


 More than ever, there is a demand for IT to deliver innovation. Your IBM i has been an essential part of your business operations for years. However, your organization may struggle to maintain the current system and implement new projects. The thousands of customers we've worked with and surveyed state that expectations regarding the digital footprint and vision of the company are not aligned with the current IT environment.
 TRY the one package that solves all your document design and printing challenges on all your platforms. Produce bar code labels, electronic forms, ad hoc reports, and RFID tags – without programming! MarkMagic is the only document design and print solution that combines report writing, WYSIWYG label and forms design, and conditional printing in one integrated product. Make sure your data survives when catastrophe hits. Request your trial now! Request Now.
 Forms of ransomware has been around for over 30 years, and with more and more organizations suffering attacks each year, it continues to endure. What has made ransomware such a durable threat and what is the best way to combat it? In order to prevent ransomware, organizations must first understand how it works.
 Disaster protection is vital to every business. Yet, it often consists of patched together procedures that are prone to error. From automatic backups to data encryption to media management, Robot automates the routine (yet often complex) tasks of iSeries backup and recovery, saving you time and money and making the process safer and more reliable. Automate your backups with the Robot Backup and Recovery Solution. Key features include:
 Business users want new applications now. Market and regulatory pressures require faster application updates and delivery into production. Your IBM i developers may be approaching retirement, and you see no sure way to fill their positions with experienced developers. In addition, you may be caught between maintaining your existing applications and the uncertainty of moving to something new.
 IT managers hoping to find new IBM i talent are discovering that the pool of experienced RPG programmers and operators or administrators with intimate knowledge of the operating system and the applications that run on it is small. This begs the question: How will you manage the platform that supports such a big part of your business? This guide offers strategies and software suggestions to help you plan IT staffing and resources and smooth the transition after your AS/400 talent retires. Read on to learn:
LATEST COMMENTS
MC Press Online