


Contrary to popular belief, there are differences between enduring a root canal and installing WebSphere Application Server for iSeries 400. The primary difference is that a root canal is usually painful, whereas installing WebSphere Application Server can be done with little or no pain (and does not require the injection of a local anesthetic). This article will guide you through the steps required for installing and initially configuring IBM WebSphere Application Server for eserver iSeries 400 v3.5. Our primary focus is the Advanced Edition, however the same steps apply for the Standard Edition. Where differences do exist between the two editions, we include specific information for Standard Edition.
Pregame: Things to Do Before WebSphere Application Server Installation
Before installing WebSphere Application Server on your iSeries 400, make sure you have the necessary hardware and software. You can find detailed information at the Prerequisites for Installing and Running WebSphere Application Server Web site at www.iseries.ibm. com/products/websphere/docs/ as400v35/docs/instprrq.html. Be sure to check the prerequisite page first in order to plan appropriately for your installation. You must take some important factors into consideration:
• Version 3.x can coexist with versions 1.1 and 2.0.x. These are separate products with separate directory structures. You can run both products at the same time as long as you use separate IBM HTTP Server instances for each version. For information on how to migrate your existing WebSphere applications to version 3.5, you should read the migration documentation available at the WebSphere Application Server Servlet Migration from Version 2.0x to Version 3.51 Web site at www.iseries. ibm.com/products/websphere/docs/Migration_v2v351.html.
• Version 3.5 cannot coexist with version 3.0.2. It is imperative that you read the migration documentation at the WebSphere Application Server for iSeries 400: Migration from Version 3.0.2.x to Version 3.5 Web site at www.iseries.ibm.com/products/websphere/ docs/35Migration.html if you are installing on a system that has v3.0.2 currently installed or has had v3.0.2 installed in the past. Even if you have no user applications to migrate, there are special instructions for removing all portions of the 3.0.2 product.
• The product documentation makes certain recommendations with respect to model, processor feature, and amount of main storage (RAM). Basically, these recommendations boil down to having a system with a processor Commercial Processing Workload (CPW) rating of 460 or higher and a minimum of 1 GB of RAM. You can use the Display Hardware Resources (DSPHDWRSC *PRC) command from the iSeries 400 command line to see the process resource information (model, processor feature, and amount of RAM) for your system. To determine the CPW rating for your model and processor, see the AS/400 System Handbook Web site at www.iseries.ibm. com/handbook. In many cases, you will find that you do not meet the minimum hardware requirements. This doesn’t mean you can’t run WebSphere Application Server on your system. It does mean that administration of the product may be slow (to the point of tedious, depending on your patience level). Many WebSphere applications do not require as much system resource as the administration functions, so systems that do not meet the minimum recommended hardware may function just fine once you are up and running. Use the Workload Estimator available at the IBM Workload Estimator for iSeries 400 Web site (www.as400service. ibm.com/estimator) to estimate the system requirements for your planned applications.
• You do not need an HTTP Server instance configured or running in order to install or start WebSphere Application Server v3.5 (or v3.02).
• You can install WebSphere Application Server using the Java Development Kit (JDK)
1.1.7 or higher. However, to start the WebSphere Application Server v3.5 environment, you must have JDK 1.2 (5769JV1 option 3) installed with the required PTFs.
Installing WebSphere Application Server v3.5
There are two ways to install WebSphere Application Server v3.5:
• Remotely from a Windows 32-bit system
• Locally from the CD-ROM drive of your iSeries 400 There are pros and cons to each method. Installing remotely from your Windows 95/98/NT/2000 workstation allows you to install from the convenience of your own desk, which is useful if you have several systems to install or if the system is several floors, buildings, or even miles away. The remote install uses the InstallShield graphical user interface to guide you through the installation and requires that you have TCP/IP connectivity from your workstation to the iSeries 400.
The local installation method is faster (approximately twice as fast as the remote method), simple, does not require user interaction, and does not require TCP/IP connectivity. Both options require that the system not be in a restricted state and that you install utilizing a user profile with *ALLOBJ authority. For information on installing from a Windows 32-bit workstation, see the product documentation for remote installation located at the Installing WebSphere Application Server on AS/400 from another workstation Web site (www.iseries.ibm.com/products/ websphere/docs/as400v35/docs/instrmot.html).
Follow these steps to locally install the WebSphere Application Server, v3.5 product on your iSeries 400:
1. Place the WebSphere Application Server v3.5 Advanced Edition for AS/400 CD in the CD-ROM drive of your system.
2. Sign on to the iSeries 400 with a user profile that has *ALLOBJ authority.
3. Ensure that the system is not in a restricted state.
4. Enter this command on the OS/400 command line exactly as shown (and as one continuous line), and be sure to specify the same capitalization as shown:
RUNJVA CLASS(SETUP) CLASSPATH(‘/QOPT/WebSphere/OS400:/QOPT/WebSphere/
OS400/INSTALL.JAR:/QOPT/WebSphere’) PROP((os400.runtime.exec QSHELL))
5. Once you hit enter, messages will appear indicating the installation steps that are currently being completed. Installation may take anywhere from 30 minutes to one hour.
6. When the message indicating that the Java program has completed is displayed, hit enter to exit the Java Shell Display screen. The product is now installed on your iSeries 400.
7. Read the readme file. The readme file is located on your iSeries 400 at /QIBM/ProdData/WebASAdv/readme.html inside your AS/400 Integrated File System (AS/400 IFS). The file can be viewed with a Web browser by mapping a drive to your iSeries 400 from a PC or by transferring the file to the PC. The readme file contains links to the iSeries 400 product Web site and to the online product documentation. Be sure to bookmark these links, and take a look around the product Web site to familiarize yourself with the information it contains. You should always refer to the online documentation when seeking information as the documentation shipped with the product is generally out-of-date. PTFs Are a Must The next step, which must be done after installation and prior to starting the WebSphere Application Server environment for the first time, is to load and apply the latest WebSphere group PTF. The group PTF includes the latest Java group PTF, DB2/400 group PTF, and IBM HTTP Server group PTF, along with WebSphere PTFs that bring you up to the latest WebSphere Application Server level. To determine the group PTF that is appropriate for your OS/400 version and release, refer to the WebSphere Application Server for AS/400: PTFs Web site at www.iseries.ibm.com/products/websphere/services/service.htm. The PTF site indicates what level of cumulative PTF package you need to have installed on your system prior to loading and applying the group PTF, any additional PTFs you may need apart from the group PTF, and contains a link to the release notes for the group PTFs’ appropriate version of WebSphere (e.g., v3.5.2). The release notes contain information on where to find the administrative console fix pack that matches the group PTF level as well. Be sure to read the release notes, installation section.
Before loading and applying the group PTF, take the time to ensure that you have all the software prerequisites installed on your system. Some users have experienced environments failing to start successfully because they installed 5769JV1 option 3 (JDK
1.2) after installing the product and the group PTF, not realizing that the group PTF contained PTFs for JDK 1.2.
Installing the Administrative Console on Your Workstation
Because the AS/400 Development Kit for Java does not support running a graphical user interface natively on the iSeries 400, you must administer your WebSphere Application Server v3.5 environment from one of the other supported WebSphere Application Server platforms. In this article, we give instructions for installing on and connecting from a Windows NT workstation platform. However, the instructions are the same for any of the other supported platforms (e.g., Windows 2000, AIX, Solaris, and HP-UNIX). Hardware and Software Prerequisites The product documentation indicates the prerequisite hardware and software for installing and running the administrative console on the various workstation platforms. See the Prerequisites for Installing and Running WebSphere Application Server Web site for details. For Windows NT, your PC needs to meet these specific requirements:
• TCP/IP Connectivity to your iSeries 400. (Note: If a firewall exists between the workstation and the iSeries 400, you can still use the administrative console, but only if the firewall does not use Network Address Translation (NAT). If the firewall uses NAT, you cannot administer your WebSphere Application Server environment from behind the firewall.)
• Pentium III 233 MHz processor or above
• CD-ROM drive
• 256 MB of memory (RAM)
• 40 MB of free disk space (minimum)
• Windows NT 4.0 (Server or Workstation), Service Pack 6A or higher. (The administrative console can also be run on a Windows 2000 workstation.)
• Web browser that supports HTML 4 and cascading style sheets (CSS) Installing the Administrative Console Follow these steps to install the administrative console on a Windows NT workstation.
1. Determine the host name for your iSeries 400. The iSeries 400 product ships a Java program that allows you to see exactly your host name as it is known to the WebSphere Application Server. Follow these steps to determine the host name:
a. Run the following command from the OS/400 command line exactly as shown, as one continuous line. Be sure to specify the same capitalization as shown:
RUNJVA CLASS(IPTest) CLASSPATH(‘/QIBM/ProdData/WebASAdv/bin’)
b. Specify the value that is displayed for the Local Name on the Java Shell display screen (with the same capitalization) when the Get Host Name Screen is displayed, as outlined in step 9. This value is the fully qualified host name for your system.
c. Hit Enter to exit the Java Shell Display screen once you make note of the information.
d. Configure a host name for your system using the Configure TCP/IP (CFGTCP) menu option 12 and change your TCP/IP Domain Information if you receive an Unknown HostException or if the value for Local Name is None.
e. Ensure that there is an entry under CFGTCP option 10, Work with TCP/IP Host Table Entries, which maps the IP address displayed to the host name.
2. Place the WebSphere Application Server 3.5 Advanced Edition for Windows NT/2000 CD in the CD-ROM drive of your PC. Do not use the WebSphere Application Server for AS/400 CD.
3. Use Windows Explorer to expand your CD-ROM drive if the WebSphere InstallShield program does not start automatically. Select the NT directory and then double-click the setup.exe file to start the install program.
4. Select the language version you wish to install and click OK. For this article, we selected English.
5. Shut down all Web servers (at the warning prompt) that you plan to use with the product. If you are installing just the administrator’s console option, you can ignore this warning. Click the Next button.
6. Click Next on the Previous Installation Detected screen. This screen will display if you have WebSphere Application Server v3.0.2 or higher already installed on your PC. You do not need to click the Backup and Uninstall button. You can specify a different installation directory for your administrative console.
7. Select Custom Installation on the Installation Options screen and click the Next button.
8. Deselect all options except for Administrator’s Console and IBM JDK 1.2.2. on the Choose Application Server Components screen. Click the Next button. Note: You must use the IBM JDK that is shipped with the product when running the console. Installing the IBM JDK 1.2.2 option only affects your WebSphere administrative console installation. It will not modify or interfere with other JDK settings or installations.
9. On the Get Host Name screen, specify the fully qualified host name for your iSeries 400 as determined from the IPTest Java program, as outlined in step 1. Remember, this value is case-sensitive, so type it in exactly as it was displayed when you ran IPTest. Click the Next button to continue.
10. On the Product Directory screen, specify the directory in which to install the administrative console and IBM JDK 1.2.2. If you already have WebSphere installed on your PC, be sure to change the default value. Click Next to continue.
11. On the Select Program Folder screen, click Next to continue.
12. The install program then installs the product.
13. Click the Finish button. The readme file displays in your browser. The readme file contains information on where to find online help for WebSphere for the platform on which you installed the administrative console. The readme file for the iSeries 400 product is located on your AS/400 IFS in the /QIBM/ProdData/WebASAdv/readme. html directory.
14. On the Restarting Windows screen (if you don’t see the screen, it may be hidden behind your browser window), select whether to restart your system and then click the OK button. For an Administrator’s Console installation, you do not need to restart Windows. Install the Appropriate Fix Pack for the Administrative Console Your administrative console version must match the version installed on your iSeries 400. Each WebSphere group PTF corresponds to a WebSphere FixPack for the non-400 platforms, and each FixPack corresponds to a new version of WebSphere. For example, FixPack 1 upgrades the product to 3.5.1; FixPack 2 upgrades the product to 3.5.2. It is important that you install the correct FixPack for your administrative console. The WebSphere for iSeries 400 group PTF release notes contain information on how to obtain the correct FixPack for your administrative console. A link to the release notes can be found on the WebSphere Application Server for AS/400: PTFs Web site for your OS/400 level. Be sure to follow the installation instructions and read about any known problems with installing the FixPack. Starting with 3.5.2 and 3.0.2.3, the WebSphere group PTF includes the matching FixPack zip file for most of the supported WebSphere platforms. The FixPacks are located in the IFS directory /QIBM/ProdData/WebASAdv/temp after you install the latest WebSphere group PTF.
Starting the WebSphere Application Server Environment
Before you start WebSphere v3.5 on your iSeries 400 for the first time, it is mandatory that you follow these steps to check configuration settings and make necessary changes:
1. You must have a TCP/IP host name specified for your system. To verify the host name, enter CFGTCP on the OS/400 command line. Specify option 12—Change TCP/IP Domain—to view the host name.
2. CFGTCP option 10, Work with Host Table Entries, must show an IP address and host name entry that matches the information displayed by the IPTest Java program that you ran earlier (see step 1 of the Installing the Administrative Console section of this article). Note: The IP address and host name combination must be accessible from the administrative console workstation.
3. Ports 900 and 9000 on the IP address that maps to the host name must be available. Use the Work with TCP/IP Network Status command with the status option (NETSTAT *CNN) to determine which ports are in use. This is rarely a problem.
4. If the Create Library (CRTLIB) command on your system has *EXCLUDE authority for *PUBLIC, you must explicitly grant *USE authority for user profile QEJB. You can check this authority by using the Display Object Authority (DSPOBJAUT) command as follows:
DSPOBJAUT OBJ(CRTLIB) OBJTYPE(*CMD)
5. An entry in the relational database directory that points to *LOCAL must exist. Use the Work with Relational Database Directory Entries (WRKRDBDIRE) command to display the RDB directory entries. If there is no entry for remote location *LOCAL, add one by using the Add RDB Directory Entry (ADDRDBDIRE) as follows:.
ADDRDBDIRE RDB(MY400) RMTLOCNAME(*LOCAL)
The name you specify for the RDB parameter is not important, although we usually use the system name.
6. The maximum number of SQL Server jobs allowed should be set to *NOMAX. Use the Change Prestart Job Entry (CHGPJE) command as follows to set the maximum number of jobs to no max (*NOMAX):
CHGPJE SBSD(QSYSWRK) PGM(QSQSRVR) MAXJOBS(*NOMAX)
7. If your OS/400 version is V4R4 and you have 5769SS1 PTF SF58102 applied, there are three specific steps you must follow:
a. Run DSPFFD QSYS2/SYSROUTINE from the OS/400 command line.
b. Find the number of fields (top of second page).
c. If the number of fields is not 35, invoke CALL QSYS/QDBFIXS2. It is best to do this in a restricted state to ensure no locks are held on the system database tables.
8. Edit the admin.properties file for the default WebSphere Application Server instance. Use the Edit File (EDTF) command—EDTF ‘/QIBM/UserData/WebASAdv/default/ properties/admin.properties’—to edit this file and change the following values:
a. Change mntr.retryValue=10 to mntr.retryValue=0
b. Add the following lines after the last java.properties line at the end of the file:
java.properties=com.ibm.ejs.sm.adminServer.
tranTimeout=120000
java.properties=com.ibm.ejs.sm.adminServer.
tranInactivityTimeout=6000000
java.properties=javax.rmi.CORBA.UtilClass=com.ibm.CORBA.iiop.Util
java.properties=com.ibm.CORBA.iiop.noLocalCopies=
true
9. Do not change any other settings in the file unless you are an experienced WebSphere Administrator.
10. Press PF3 twice to save and exit.
11. In order for the WebSphere environment to start successfully, TCP/IP must be started through the Start TCP/IP (STRTCP) command Starting the WebSphere Application Server Environment You start the WebSphere for iSeries 400 environment by starting the QEJBSBS subsystem. Enter the Start Subsystem command (STRSBS QEJB/QEJBSBS) from the OS/400 command line. The QEJBSBS subsystem starts and two jobs, QEJBMNTR and QEJBADMIN, will appear. The QEJBMNTR job spawns the QEJBADMIN job and monitors its health. The QEJBADMIN job is the WebSphere administrative server job and is responsible for implementing all your WebSphere administrative tasks. The administrative console connects to the administrative server job. Is the WebSphere Environment Ready for Business? You must wait until the WebSphere Application Server environment has successfully started before attempting to connect the administrative console. The first time you start the QEJBSBS subsystem, the administrative server creates the sample WebSphere configuration, which includes everything you need to run the sample servlets, JavaServer Pages (JSPs), and Enterprise JavaBeans (EJBs). Because the WebSphere initialization code is creating the sample configuration, the first start takes longer than subsequent startups. On very underpowered systems, WebSphere startup can take as long as 45 minutes and possibly longer.
Perform these actions to determine if your WebSphere environment has successfully started:
1. Enter the Work with Active Jobs (WRKACTJOB) to display the QEJBSBS subsystem as follows:
WRKACTJOB SBS(QEJBSBS)
2. Specify option 5, Work with Job, next to the QEJBADMIN job and press Enter.
3. Specify option 10, Display Job Log, on the command line that appears and press Enter.
4. Look for the message WebSphere administration server QEJBADMIN ready.
5. Refresh the screen periodically until the message appears.
Once the WebSphere environment has started successfully, you can start the administrative console.
Starting the Administrative Console
One of the most common problem areas encountered with WebSphere Application Server for iSeries 400 Advanced Edition is trying to connect the administrative console to your administrative server. Standard Edition does not present as many problem situations because the host name is not case-sensitive for Standard Edition. However, the same TCP/IP connectivity requirements exist, and the same restrictions on firewalls that utilize NAT exist. You can minimize the risk of failure by running through this checklist for administrative console connectivity:
• Make sure the administrative server is ready.
• Make sure you can PING the iSeries 400 from your PC by using the PING command: ping My400.
• Make sure you can PING the PC from the iSeries 400: ping myPC or ping ip_address.
• Check if your PC Hosts file contains an entry for the iSeries 400. You do not always have to have an entry for the iSeries 400, but if you do, it must be correct with respect to case sensitivity. On NT, the hosts file is located in winntsystem32driversetc. For example, if your IPTest shows your system’s IP address and fully qualified host name to be 9.9.9.1 and MySYS.MYNET.MYCOMPANY.COM, the entry in the Hosts file should be 9.9.9.1 MySYS.MYNET.MYCOMPANY.COM MySYS
• Make sure there is not a firewall that uses NAT between the PC and the iSeries 400.
• Make sure that your administrative console version and edition match that of WebSphere on your iSeries 400. WebSphere’s product.xml file contains the edition and version information for the installation. The file is found in the properties/ com/ibm/websphere directory under the product installation directory. For OS/400, the file is /QIBM/ProdData/ WebASAdv/properties/com/ibm/websphere/product.xml. For Windows platforms, the default is websphereappserverpropertiescomibmwebsphereproduct.xml. The files should contain the same information if both installations are at the same version level and edition.
Start the Console
Starting the console is quite simple. When you installed the administrator’s console option from the WebSphere for Windows NT install CD, a shortcut was created using the information you provided on the Get Host Name screen. From the Windows NT Start menu, click Programs > IBM WebSphere > Application Server v3.5 > Administrator’s Console. As the console is starting, a dialog appears indicating that the console is establishing the connection with the administrative server. During this time, the console connects to the administrative server and requests information about the WebSphere resources that are configured for the WebSphere administrative instance. The administrative server running on the iSeries 400 looks this information up in the administrative repository (an SQL collection) using Java Database Connectivity (JDBC), and returns it to the console. Depending on your hardware, this process can take several minutes or longer. Figure 1 shows the initial connection dialog.
Once the console has established the connection and loaded the initial information, the dialog disappears and, shortly thereafter, the Administrative Console GUI appears. You must wait for the Console Ready. message before using the console. If the GUI does not appear shortly after the dialog disappears, your console has failed to connect successfully. Additional debugging is necessary. Two good sources of information on this problem (should it occur) and for any other problems are the product FAQs database available at the WebSphere Application Server for iSeries 400: FAQ Web site (www.iseries.ibm.com/products/ websphere/docs/faq.htm) and the WebSphere Application Server for AS/400: Forum product news group Web site (www. iseries.ibm.com/products/websphere/services/forum.htm). Figure 2 shows the administrative console GUI. Configuring Your IBM HTTP Server Instance for WebSphere Application Server In order to access servlets and JSPs, you need to configure your IBM HTTP server instance so that it routes requests for your servlets and JSPs (and any other Web resources you explicitly configure under WebSphere) to the WebSphere application server. This is very simple to do using the HTTP server admin instance. Note: You cannot use a WebSphere 1.1 or 2.0.x IBM HTTP Server instance with WebSphere 3.x. Although the two products can coexist and run simultaneously on the same system, you must use unique HTTP Server configurations for each server.
To configure your IBM HTTP Server instance for WebSphere v3.5, start the *ADMIN instance of the IBM HTTP Server using the Start TCP/IP Server (STRTCPSVR) command as follows:
STRTCPSVR SERVER(*HTTP) HTTPSVR(*ADMIN)
Follow the instructions found on the Editing the IBM HTTP Server for AS/400 Configuration File Web site (www.iseries.ibm.com/products/websphere/docs/as400v35/ docs/insthedc.html) to configure your HTTP server instance for WebSphere v3.5. Figure 3 shows the configuration screen that enables your HTTP server configuration for WebSphere Application Server. Select default for the WebSphere domain field.
Note: Starting in 3.5.1, the Lotus Domino for AS/400 V5.0.5 HTTP server is also a supported environment for the WebSphere Application Server. For information on using this HTTP server, see the Lotus Domino HTTP Server Support for WebSphere Application Server v3.5.1 Web site (www.iseries.ibm.com/products/websphere/docs/ dominoWebServerSupport35.html).
Verifying Your Installation
Now that you have successfully installed and started the WebSphere Application Server environment, you can verify your configuration by starting the Default Server application server and running the Hello World sample. The product ships with a large samples gallery that contains an abundance of sample servlets, JSPs, and Enterprise JavaBeans to help you get started. The product’s Verifying WebSphere Application Server Installation Web site (www.iseries.ibm.com/products/websphere/docs/as400v35/docs/instvrfy.html) contains excellent instructions on how to verify your install and setup by running the HelloWorld sample.
Installing, starting, and administering WebSphere Application Server really can be relatively pain-free. This is especially true if you meet the minimum hardware requirements, read the online documentation and the release notes available at the WebSphere Application Server for AS/400: Documentation Web site (www.iseries.ibm.com/products/websphere/docs/doc. htm), and make sure you have the required PTFs and FixPacks, which are available at the WebSphere Application Server for
AS/400: PTFs Web site. Of course, it never hurts to cross your fingers and think good thoughts, too. Two good resources for getting help with the product are the WebSphere Application Server for iSeries 400: FAQs Web site and the WebSphere Application Server for AS/400: Forum Web site.
References and Related Materials
AS/400 System Handbook Web site: www.as400.ibm.com/handbook
Editing the IBM HTTP Server for AS/400 Configuration File Web site: www.iseries.ibm.com/products/websphere/docs/ as400v35/docs/insthedc.html
IBM Workload Estimator for iSeries 400 Web site: www. as400service.ibm.com/estimator
Installing WebSphere Application Server on AS/400 from another workstation Web site: www.iseries.ibm.com/products/websphere/docs/as400v35/docs/instrmot.html
Lotus Domino HTTP Server Support for WebSphere Application Server v3.5.1 Web site: www.iseries.ibm.com/ products/websphere/docs/dominoWebServerSupport35.html
Prerequisites for Installing and Running WebSphere Application Server Web site: www.iseries.ibm.com/products/websphere/ docs/as400v35/docs/instprrq.html
Verifying WebSphere Application Server Installation Web site: www.iseries.ibm.com/products/websphere/docs/as400v35/docs/instvrfy.html
WebSphere Application Server for AS/400: Documentation Web site: www.iseries.ibm.com/products/websphere/docs/doc.htm
WebSphere Application Server for AS/400: Forum Web site: www.iseries.ibm.com/products/websphere/services/forum.htm
WebSphere Application Server for AS/400: PTFs Web site: www. series.ibm.com/products/websphere/services/service.htm
WebSphere Application Server for iSeries 400: FAQs Web site: www.iseries.ibm.com/products/websphere/docs/faq.htm
WebSphere Application Server for iSeries 400: Migration from Version 3.0.2.x to Version
3.5 Web site: www.iseries.ibm. com/products/websphere/docs/35Migration.html
WebSphere Application Server Servlet Migration from Version 2.0x to Version 3.51 Web site: www.iseries.ibm.com/products/websphere/docs/Migration_v2v351.html
Telling WebSphere Application Server Standard and Advanced Editions Apart
WebSphere Application Server for iSeries 400 v3.x has two editions: Standard and Advanced. Which edition is right for you depends on what type of application you plan on developing or using. If you are just getting your feet wet with Java servlets and JavaServer Pages (JSPs), there is no reason to purchase Advanced Edition v3.5 when you can get Standard Edition v3.5 for free. Standard Edition is a subset of Advanced Edition. Installation, configuration, and administration of the two editions is identical for v3.0.2 and v3.5 (see the attached article for specific installation and configuration instructions). Upgrading from Standard Edition to Advanced Edition can be done easily when you follow the migration instructions found on the WebSphere Application Server for iSeries 400 Migration Web site at www.iseries.ibm.com/products/ websphere/product/migration.html.
If you wish to use an HTTP server instance running on a different system or platform to access your Web applications running on your iSeries 400 or if you plan on using Enterprise JavaBeans (EJBs), you need to purchase Advanced Edition. However, once you are ready to go into production mode with your Web applications, you should strongly consider purchasing Advanced Edition. Advanced Edition contains support for multiple node configurations that include cloning and load balancing as well as support for running your HTTP Server instance on a separate iSeries 400 or even another platform. See the Multiple nodes Web site at www.iseries.ibm.com/products/websphere/docs/as400v35/docs/nodes.html for more information.
To clarify the differences between the two products even more, here’s an overview of what each product contains.
Standard Edition Features
• No charge, orderable licensed program option (LPO). (See the WebSphere Application Server for iSeries 400: Packaging Information, Standard Edition: v3.5, Web site at www.iseries.ibm. com/products/websphere/news/packageSE35.html for details.)
• Uses Java 2 Software Development Kit V1.2.2
• Support for JavaServer Pages .91, 1.0 and 1.1 as of v3.5.2
• Extended tagging support for queries and connection management for JavaServer pages
• Extensible Markup Language-compliant document type definition (DTD) for JavaServer pages
• Support for Java Servlet API specification 2.1 and 2.2 as of v3.5.2, including automatic user session and user state management
• High speed pooled database access using JDBC 2.0
• Extensible Markup Language server tools including a parser and data transformation tools
• Extensible Stylesheet Language (XSL) support
• Integration with Visual Age for Java and WebSphere Studio products to help reduce development time by allowing developers to remotely test and debug Web-based applications
Advanced Edition Features
• Chargeable, orderable LPO. (See the WebSphere Application Server for iSeries 400: Packaging Information, Advanced Edition: v3.5, Web site at www.iseries.ibm.com/products/websphere/ news/packageAE35.html for details.)
• Contains all of the features of Standard Edition
• Full support for the EJB 1.0 specification, including both session and entity Beans (container-managed and bean-managed persistence).
• Full support for Remote Open Servlet Engine (Remote OSE) which allows you to use any supported HTTP Server instance running on any supported WebSphere platform to access your Web applications running in WebSphere Application Server on your iSeries 400. (For more information on Remote OSE, see the Using Remote OSE transport for forwarding request Web site at www.iseries.ibm.com/products/websphere/ docs/as400v35/docs/rmtose.html.)
• Deployment support for EJB, Java servlets, and JSP with performance and scalability improvements, including Application-level partitioning and Load balancing
• Support for distributed transactions and transaction processing
• Management and security controls, including User and group level setup and Method level policy and control
—Frances Stewart and Kevin G. Paterson
Fourteen Steps to WebSphere Application Server Remote Installation
Our main article detailed the steps you would use to install the WebSphere Application Server locally from your OS/400-based machine. However, there is also an option to install the product remotely from a Windows 32-bit workstation. If you are installing the product remotely from a Windows 32-bit workstation, here are fourteen steps to get it done.
Before installation, verify that OS/400 Host Servers (5769SS1 option 12) are present on your system. This is a requirement to remotely install the WebSphere Application Server on your iSeries 400. Also, be sure to check the required hardware and software configurations we listed in the main article. Once these items are verified, follow these steps to install the product on your iSeries 400 remotely from a Windows 95/98/NT/2000 workstation. The remote installation program uses the AS/400 Toolbox for Java classes (included with the installation program) to remotely install WebSphere on your iSeries 400. Follow these simple steps for successful remote installation:
1. Ensure that you can connect to the iSeries 400 from your PC using TCP/IP. This verification must be made by using either the host name or IP address of your target iSeries 400.
2. Ensure that TCP/IP is started on your iSeries 400 through the Start TCP/IP (STRTCP) command.
3. Ensure that the QSERVER subsystem is started on your iSeries 400 by using the Start Subsystem (STRSBS) command: STRSBS SBS(QSERVER) .
4. Ensure that the OS/400 Host Server jobs are started on your iSeries 400 by using the Start Host Server (STRHOSTSVR) command: STRHOSTSVR *ALL .
5. Place the WebSphere Application Server v3.5 Advanced Edition for AS/400 CD in the CD-ROM drive of your Windows 32-bit system. Do not use the WebSphere Application Server Advanced Edition for Windows NT/2000 CD that also comes with the product.
6. Begin your remote installation procedures. If Autorun is enabled on your workstation, the WebSphere InstallShield program starts automatically. Otherwise, use Windows Explorer to select your CD-ROM drive. Double-click the setup.bat file to start the installation program.
7. Click the Next button on the Welcome screen.
8. Enter the host name or IP address of the iSeries 400 system on which you want to install the product. Enter a user ID and password for a valid OS/400 user profile with *ALLOBJ authority on the iSeries 400. Click the Next button to continue.
9. Select the Base and Server checkboxes on the next screen. You can also select the language version to install on this screen. We usually recommend that you keep the default. Click the Next button to continue.
10. Specify, on the Choose Destination Directory, a directory on your PC to contain the files needed for remotely uninstalling the product from your iSeries 400. Note: The destination directory is not a directory on the iSeries 400 and does not specify where to install the product. If you are installing several systems from the same workstation, be sure to specify unique directory paths for each installation (the default should be unique). Click the Install button to start installing the product.
11. Click the Yes button to have destination directories created if a dialog appears indicating that the destination directory does not exist.
12. Begin the installation, which may take anywhere from 30 minutes to one hour to complete. The installation may appear to be stuck or hanging, but just be patient. If an error occurs, the installation program displays a dialog box indicating the error.
13. Click the Finish button to exit the installation program once you receive a message stating that the installation is complete.
14. Read the readme file. The readme file is located on your iSeries 400 at /QIBM/ProdData/WebASAdv/ readme.html. The file can be viewed with a Web browser by mapping a drive to your iSeries 400 from a PC with a Web browser or by transferring the file to the PC. The readme file contains links to the iSeries 400 product Web site and to the online product documentation. Bookmark these links immediately, and explore the product Web site to familiarize yourself with the information it contains. You should always refer to the online documentation when seeking information as the documentation shipped with the product is generally out-of-date.
—Frances Stewart and Kevin G. Paterson
Figure 1: This initial connection dialog message appears as the administrative console establishes the connection to the administrative server.
Figure 2: After the administrative console starts successfully, you should receive the Console Ready message.
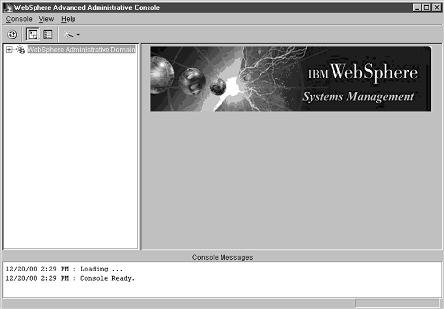
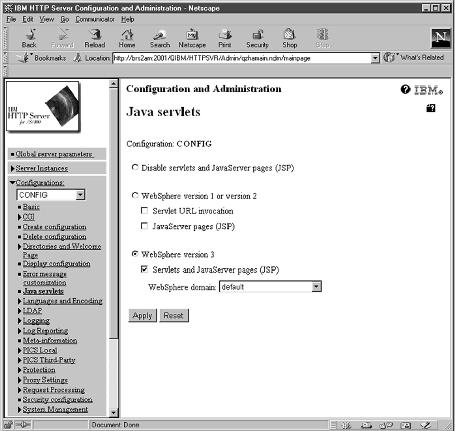
Figure 3: Configuring your IBM HTTP Server instance for WebSphere Application Server is a snap.


 More than ever, there is a demand for IT to deliver innovation. Your IBM i has been an essential part of your business operations for years. However, your organization may struggle to maintain the current system and implement new projects. The thousands of customers we've worked with and surveyed state that expectations regarding the digital footprint and vision of the company are not aligned with the current IT environment.
 TRY the one package that solves all your document design and printing challenges on all your platforms. Produce bar code labels, electronic forms, ad hoc reports, and RFID tags – without programming! MarkMagic is the only document design and print solution that combines report writing, WYSIWYG label and forms design, and conditional printing in one integrated product. Make sure your data survives when catastrophe hits. Request your trial now! Request Now.
 Forms of ransomware has been around for over 30 years, and with more and more organizations suffering attacks each year, it continues to endure. What has made ransomware such a durable threat and what is the best way to combat it? In order to prevent ransomware, organizations must first understand how it works.
 Disaster protection is vital to every business. Yet, it often consists of patched together procedures that are prone to error. From automatic backups to data encryption to media management, Robot automates the routine (yet often complex) tasks of iSeries backup and recovery, saving you time and money and making the process safer and more reliable. Automate your backups with the Robot Backup and Recovery Solution. Key features include:
 Business users want new applications now. Market and regulatory pressures require faster application updates and delivery into production. Your IBM i developers may be approaching retirement, and you see no sure way to fill their positions with experienced developers. In addition, you may be caught between maintaining your existing applications and the uncertainty of moving to something new.
 IT managers hoping to find new IBM i talent are discovering that the pool of experienced RPG programmers and operators or administrators with intimate knowledge of the operating system and the applications that run on it is small. This begs the question: How will you manage the platform that supports such a big part of your business? This guide offers strategies and software suggestions to help you plan IT staffing and resources and smooth the transition after your AS/400 talent retires. Read on to learn:
LATEST COMMENTS
MC Press Online